



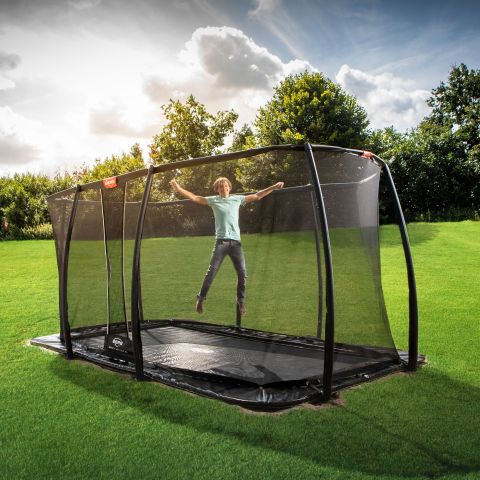
Do you also want a trampoline that does not stand out too much in the garden, so that you can keep enjoying your lovely view? Then an inground or flatground trampoline is what you are looking for. You can choose a model with or without a net, and you can choose between several brands. For example, there are inground and flatground trampolines from BERG, Exit, Salta and Avyna.
The difference between an inground and a flatground trampoline lies in the mounting height of the frame.
With an inground trampoline, the top of the trampoline still stands between 20 and 27 cm above ground level / the grass, because the legs of the trampoline stand on the grass. The pit or hole is therefore also smaller in diameter for an inground trampoline than the total diameter of the trampoline, because the legs stand next to the pit / hole.
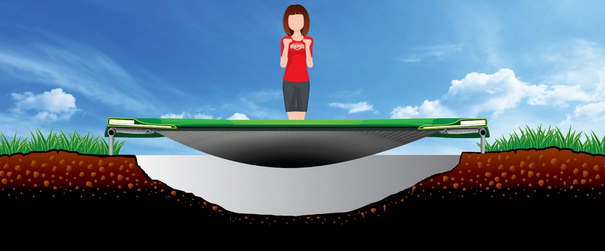
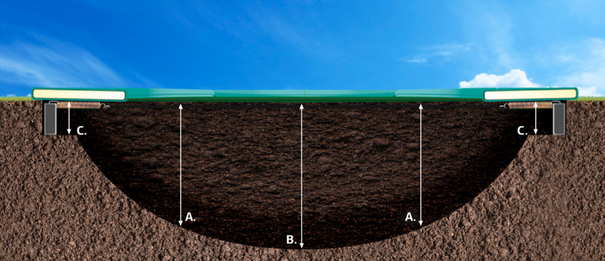
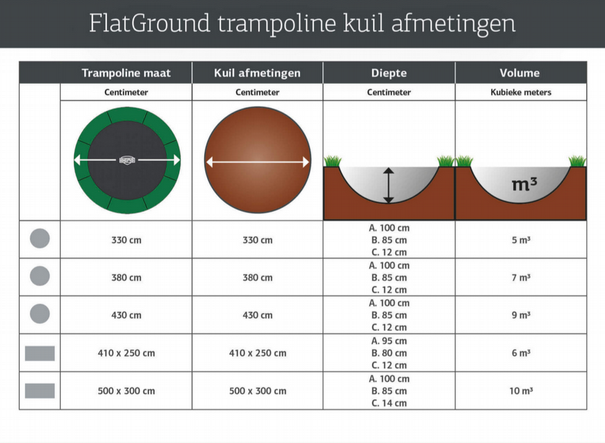
With a flatground trampoline, you dig out the full diameter of the trampoline and prepare a base or ledge around the outer edges of the pit. The frame then rests on this ledge and therefore sits fully sunken. With a flatground trampoline you have a little more preparation work, but the result is neater, because the trampoline is level with the ground / the grass.
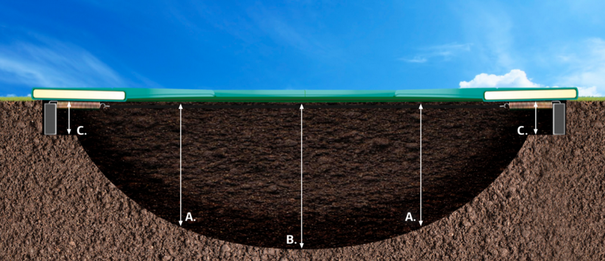
The amount of earthwork depends on the size of the trampoline. Are you curious what exactly you will need to dig out? Then take a look at our digging guide for the BERG inground and flatground trampolines.
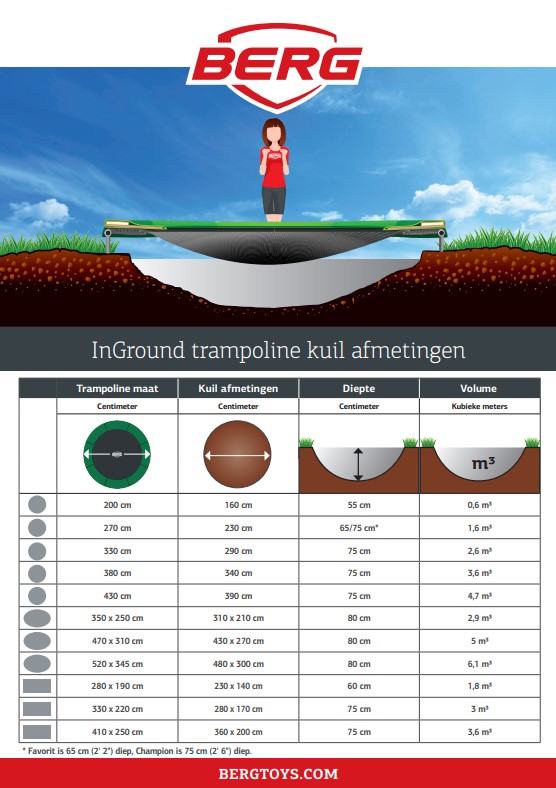
When digging in a BERG inground trampoline, you need to take the following dimensions into account:
When digging in a BERG flatground trampoline, you need to take the following dimensions into account:
Ready for the real work? Then take a look at our instructions and videos for digging in a BERG inground trampoline or a BERG flatground trampoline.
Step 1: Decide where you want to bury the trampoline
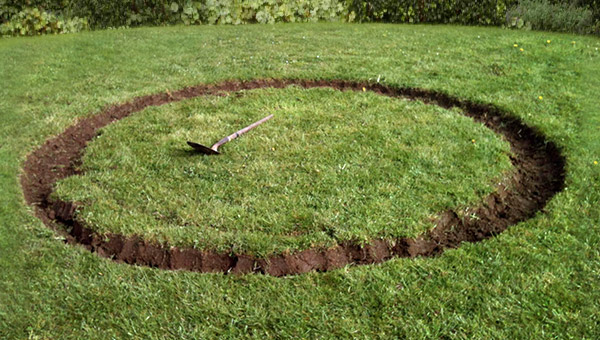
Look around the garden for where you want to bury the trampoline. It is important to choose a spot where you can still easily move around. Bear in mind, for example, that there must still be room to get past the trampoline with the lawnmower. As for a safe distance from fences or other enclosures, we recommend leaving a distance of 2m between the trampoline and other obstacles.
With BERG trampolines, we also supply a measuring tape as standard, made specifically for the trampoline you ordered. This makes it easy to determine the exact size of the pit / hole.
Step 2: Location decided: time to dig!
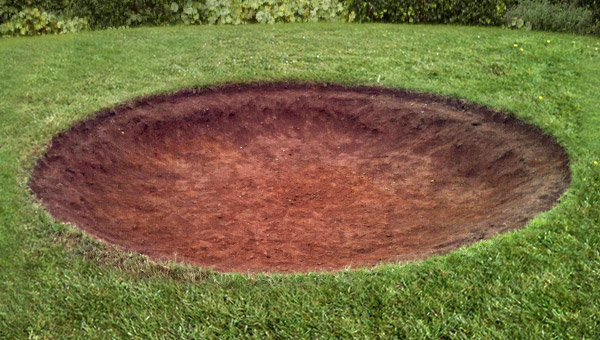
The location has been decided and now we can start the real preparations: digging the pit. As you could see above, a fair amount of soil comes out of a pit for a trampoline. So think in advance about what you want to do with the excavated soil. You could possibly use it elsewhere in the garden to raise the level a little or to create flower beds, or perhaps you can do your neighbour a favour with it. It is also always possible to take the excavated soil to the recycling centre.
To dig the pit, you can call on a garden contractor with a mini excavator, but you can also perfectly well dig it yourself with a spade and wheelbarrow.
Step 3: Determining the right depth
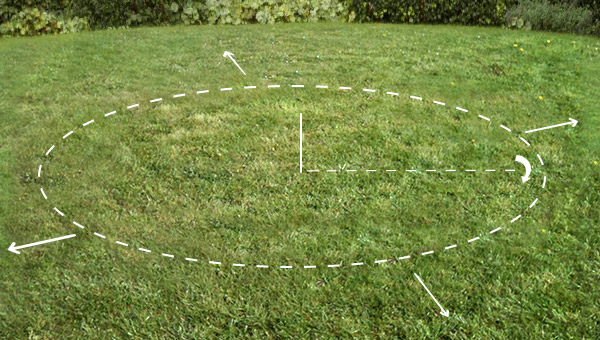
The right depth varies from trampoline to trampoline and is clearly stated in the instructions. A minimum depth is 75 cm in the centre. You need to bear in mind that when you bounce on a trampoline, you go down the deepest when you jump in the centre. That is why the pit / hole also has to be dug in the shape of a bowl or soup plate. You start less deep at the sides and then go deeper towards the centre.
Step 4: Assembling the trampoline
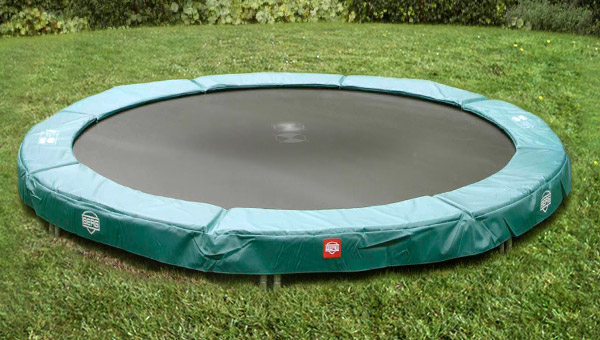
Assembling the trampoline itself and placing it over the pit is usually fairly easy. First build the trampoline according to the instructions somewhere on the grass, then pick it up with a few people and place it over the pit. The work is now done, and it is time for the kids to enjoy their new trampoline for years to come.
Assembly video BERG Flatground trampoline
Assembly video BERG Inground trampoline
A few more questions and facts about in-ground trampolines
Can I also dig in an above-ground trampoline?
It is not advisable to dig in an above-ground trampoline later. There are 2 important reasons for this: the zinc treatment of the legs and the displacement of air. An in-ground trampoline has legs that have received an extra zinc treatment against rust, and this has not been applied to the same extent on an above-ground trampoline. The jumping mat of an above-ground trampoline is also usually less air-permeable, so the air cannot escape properly and you may get a thudding sound every time you jump.
What happens to the water in the pit during extreme rainfall?
This is usually not a problem in Belgium and the Netherlands, because there is little extreme rainfall. As a result, the water will drain into the ground automatically. If you do have excess water that stays in the pit, you can always install a pipe or drainage system. It is best to contact a garden contractor about this.
How can I prevent weeds under the trampoline?
Weeds can sometimes grow under the trampoline, so it is important to consider beforehand how you can stop this. We always recommend using a weed membrane. It is water-permeable but blocks light and root growth.
You can get the weed membrane at most DIY stores or garden centres. Remember that the heavier the fabric is, the sturdier it is. After buying the weed membrane, you can cut it to size, lay it in the pit and secure it with anchor pins. If you need to overlap it anywhere, make sure there is an overlap of at least 10 cm.
If you still have questions about digging in a trampoline, please feel free to contact our customer service.